How to Change Photos into a Slideshow
Do you have some pictures and want to put them together? Moviezilla will come to help you to change these photos into a slideshow. The slideshow will make these photos look more vivid and fantastic. And you can add kinds of video effects to your slideshow, such as transitions, filters, and overlays. Moreover, a slideshow can atrract others. They will be interested other than just flip your photos one by one.
A slideshow is able to perfectly show the story of your photos and make good use of the value of each one. As long as you finish following steps, you can change your photos into a slideshow.
Step1: Import your photos
First of all, you need to open MovieZilla by a double-click. Next click the "+" in the middle to choose and import images here. 
Select the photos want to import.

Then click the "Open" button to import it.

After you import your photos one by one, they will be added to Timeline automatically.

Step 2: Add an opening video
There are options for videos and images. Click "Sample Videos".

Select an opening video clip and click "Add to Timeline".

Then rearrange the order of the clip and your photos.

Step 3: Add a text
Now click "TEXT/CREDIT".

Select a title style and apply it to Timeline.

Then your title will be added automatically.

Don't forget to edit your own text.

Step 4: Add transitions
Click "TRANSITIONS".

Now click "Random to All" and transition effetcs will be added randomly.

You can see all transitions on Timeline.

You can also choose to add transitions one by one, which is a more customized way
Step 5: Add filters
Click "FILTERS" to choose filters. 
Click to select one filter.

Then, click "Apply to Timeline".

Then your filter will be added automatically.

You can now set duration for it.

Step 6: Add overlays
Click "OVERLAYS". 
Select one and apply it to Timeline.

Then your overlay will show on Timeline automatically.

Rearrange its starting time and duration.

Step 7: Add elements
Add an overlay track by clicking the "Add Track" button in the left bottom cornor.

Then, click "ELEMENTS". 
Select one and apply it to Timeline.

Rearrange its starting time and duration.

Adjust its size and position.

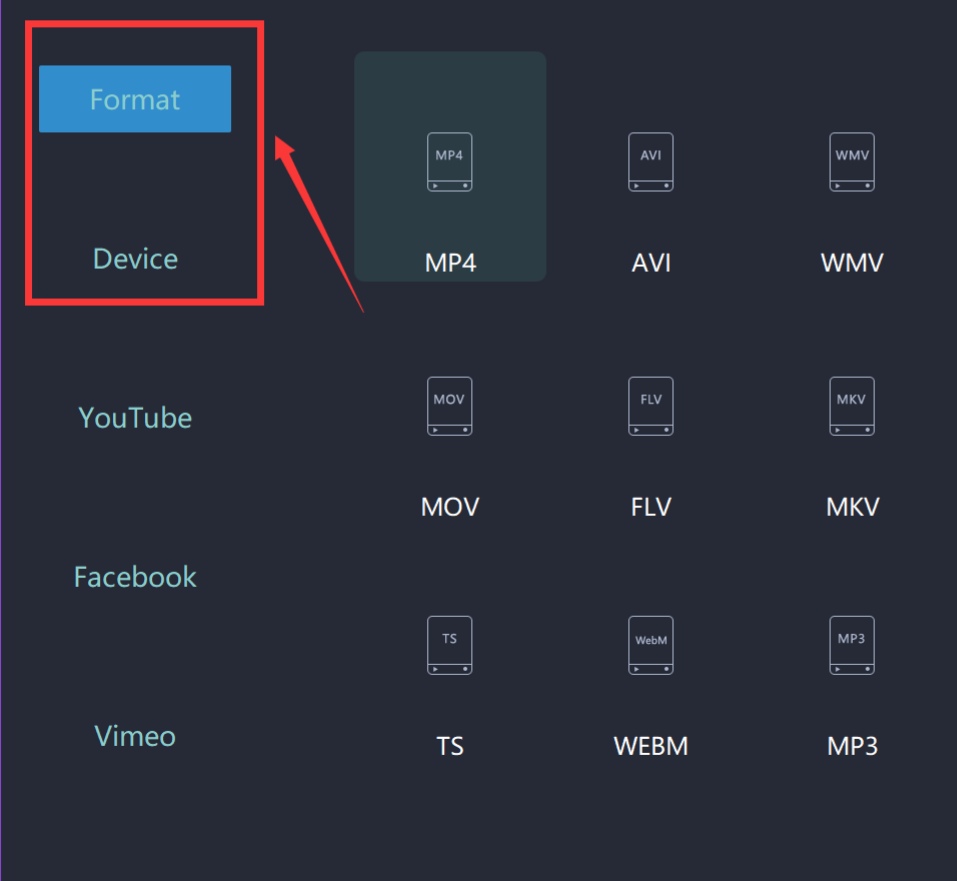
Step 8: Export your video
Just click "EXPORT".

Then choose a format from these two categories.
Rename your video and select the saving location. 
Moreover, you can even change more settings in detail from here. 

Finally, you can export it successfully. 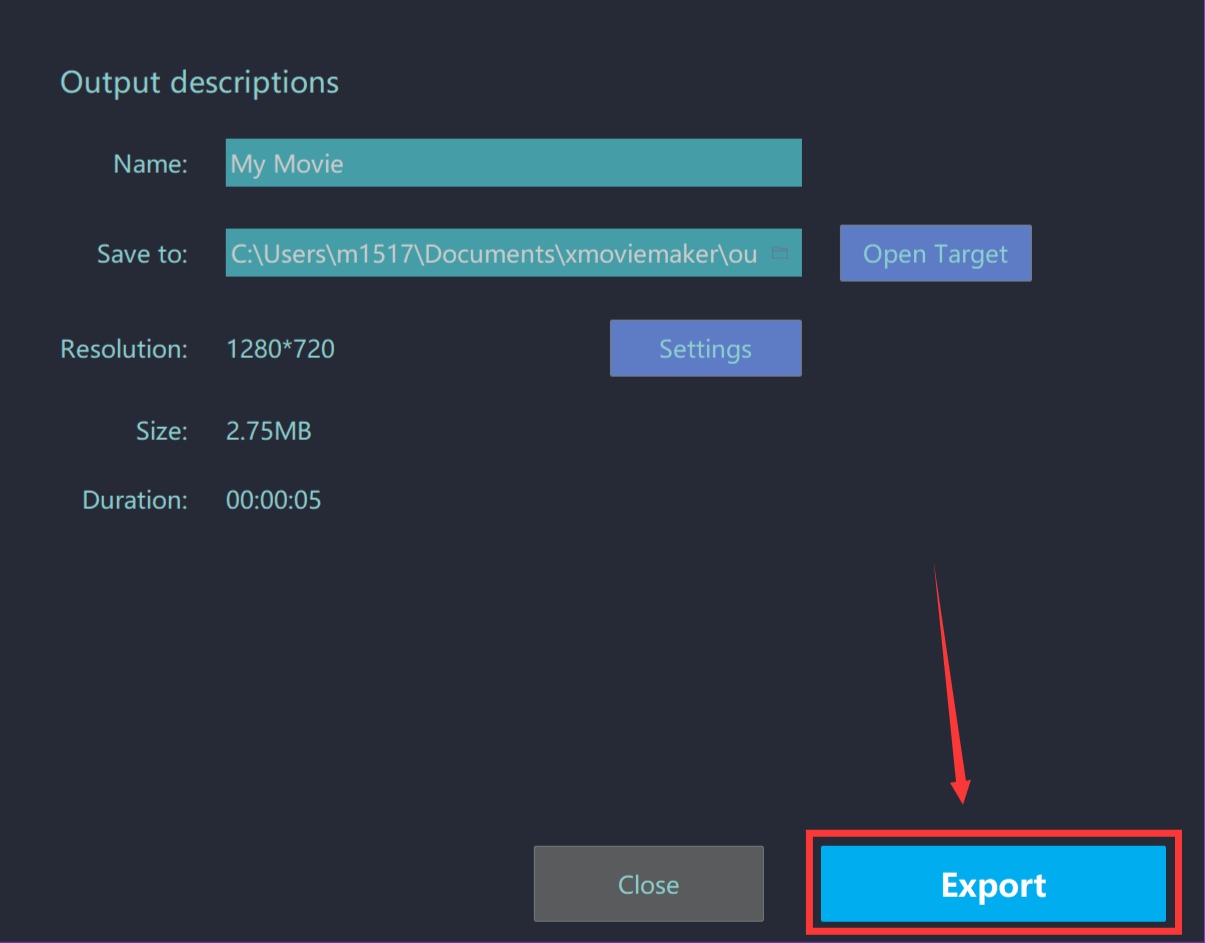
You can make your own slideshow with these steps simply and easily.
Lastly, wish this guidance content would help you to make your video look better.